Introduction to Comfort Bike Maintenance
Did you know that regular maintenance can extend the life of your comfort bike by several years? Many cyclists overlook basic upkeep, leading to unexpected breakdowns and costly repairs. As someone who has navigated countless trails and paths, I’ve learned that a little attention goes a long way in keeping my bike in peak condition.
In this article, I will share essential hacks for maintaining your comfort bike, ensuring it stays in great shape for all your rides. From understanding its unique components to implementing a proper cleaning routine, these tips are designed to enhance your biking experience. By following these simple yet effective strategies, you’ll not only improve your ride but also prolong the life of your beloved bike. Let’s dive into the world of comfort bike maintenance!
Understanding Your Comfort Bike
Understanding the unique characteristics of a comfort bike is essential for effective maintenance and care. Unlike road or mountain bikes, comfort bikes are designed for leisurely rides, emphasizing ease and enjoyment. They feature a relaxed geometry that allows for an upright riding position, reducing strain on your back and neck.
Key Features of a Comfort Bike
Knowing these aspects helps to identify the specific maintenance needs of your bike. For instance, the broader tires may require different inflation and tread checks compared to narrower ones.
Purpose and Performance
Comfort bikes serve a unique purpose—they’re ideal for leisurely rides around the neighborhood, on scenic trails, or during casual group outings. While they’re not built for high-speed racing, they excel in providing a smooth, easy ride, perfect for casual cyclists and those looking to enjoy the great outdoors without the stress of performance biking.
Equipped with this foundational knowledge, let’s explore the first step to maintaining this wonderful machine: regular cleaning. Implementing a proper cleaning routine is crucial to preserving its features and overall functionality.
Regular Cleaning: The Key to Longevity
Maintaining a clean bike is the cornerstone of preserving its performance and appearance. Just as I wouldn’t let my car accumulate dirt and grime, I make it a point to wash my comfort bike regularly. This routine not only keeps the bike looking great but also prevents the accumulation of rust and damaging debris that can impair function.
Why Cleaning Matters
Over time, dirt, mud, and road grime can build up on your bike, leading to corrosion and wear. Keeping your bike clean helps to:
Best Practices for Cleaning
Here’s a simple step-by-step approach I follow when cleaning my bike:
- Gather Your Supplies: A bucket, mild soap (avoid harsh chemicals), a soft brush, and microfiber cloths are essential.
- Rinse and Brush: Start by rinsing the bike with water, then use a soft brush to gently scrub away dirt. Pay special attention to hard-to-reach areas like the brakes and gears.
- Wash: Fill a bucket with soapy water, and using your brush, thoroughly clean the frame, wheels, and other components.
- Rinse and Dry: Rinse off the soap with clean water and wipe down the bike with a microfiber cloth. This prevents water spots and further moisture accumulation that could foster rust.
- Final Touches: After drying, inspect moving parts and excess debris, ensuring a smooth ride.
Choosing a dedicated bike cleaning kit can simplify the process and ensure you have everything you need at hand.
With a regular cleaning habit established, your comfort bike will stay in optimal condition, allowing for many enjoyable rides ahead. Speaking of maintenance routines, let’s move on to tire care, a vital aspect of ensuring your bike rides smoothly and safely.
Tire Care: Ensuring a Smooth Ride
Tire maintenance is one aspect of bike upkeep that I can’t stress enough. Keeping my tires in top shape not only enhances my comfort but also significantly affects my riding safety. After all, they’re the only contact between my bike and the road. Here’s how I ensure optimal tire performance and safety during my rides.
Checking Tire Pressure
First up is tire pressure. Regularly checking tire pressure is essential for a smooth ride. Overinflated tires can lead to a harsh ride, while underinflated tires can result in poor handling and increased tire wear. I recommend using a digital pressure gauge for accuracy—this tool helps me ensure my tires are always at the manufacturer’s recommended PSI (pounds per square inch).
Inspecting for Wear and Tear
Next, I inspect my tires for any signs of wear and tear. Here are the key things I check:
Proper Methods for Inflating Tires
When it comes to inflating tires, I always ensure I follow the proper steps:
- Remove the Valve Cap: This allows easy access to the valve stem.
- Attach the Pump: If I’m using a floor pump, I ensure it fits snugly on the valve to prevent air loss.
- Inflate: I pump the tire until I reach the correct psi as indicated on the sidewall.
- Check and Replace the Valve Cap: After inflating, I always remember to reattach the valve cap to prevent dirt from entering.
By following these practices, I’m able to maintain smooth rides and enhance the lifespan of my tires. Next, let’s dive into brake maintenance, ensuring I can stop safely when I need to!
Brake Maintenance: Stopping Safely
When it comes to bike maintenance, I can’t overemphasize the importance of keeping your braking system in top condition. After all, effective brakes are critical for safety and control during any ride. In this section, I’ll guide you through essential steps for inspecting and maintaining your bike’s brakes, ensuring reliable stopping power every time.
Inspecting Brake Pads
The first step in brake maintenance involves checking the brake pads. Over time, brake pads wear down and can lose effectiveness. Here’s how I assess their condition:
If you find that your brake pads need replacement, consider the following reliable option:
Adjusting Brake Cables
Next, I turn my attention to the brake cables. Frayed or damaged cables can lead to brake failure. Here’s how I adjust them:
- Check Cable Tension: I squeeze the brake levers; they should engage the brakes without much effort. If the levers pull too far or feel loose, it’s time to adjust.
- Tightening the Cable: Using a 10mm wrench, I loosen the bolt at the brake arm, pull the cable snug, and retighten to ensure the brakes engage properly.
Regular Lubrication
Lubrication is another crucial aspect of brake maintenance. I apply a small amount of bike-specific lubricant to pivot points on the brake arms to keep movement smooth. However, I’m careful not to get any lubricant on the brake pads or rim surfaces, as it can reduce their effectiveness.
By conducting these simple yet crucial checks and adjustments, I can ensure that my bike’s braking system is always ready to respond when I need it. With my brakes on point, I feel more confident hitting the road. Up next, we’ll tackle lubrication for other bike components to keep everything moving smoothly.
Lubrication: Keeping Parts Moving Smoothly
Maintaining the right level of lubrication on your comfort bike is essential for ensuring a smooth ride and prolonging the life of various components. Those moving parts—like the chain and gears—are what allow me to enjoy my time on the road without hiccups. Proper lubrication minimizes friction and reduces wear, making this maintenance step non-negotiable for every cyclist.
The Chain: Lifeline of Your Ride
The bike chain is arguably the most critical component to lubricate. A well-lubricated chain not only enhances performance but also improves shifting and extends the life of your drivetrain. Here’s how I approach chain lubrication:
- Cleaning First: Before applying lubricant, I ensure the chain is clean. A dirty chain can trap grit that leads to excessive wear.
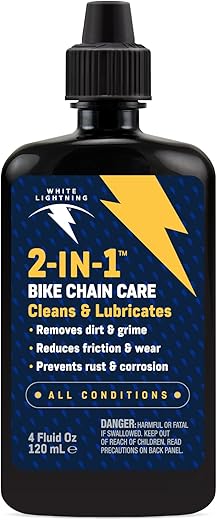
- Choosing the Right Lubricant: I prefer a dry lubricant like the , especially during dry conditions. It repels dirt and grime while offering excellent protection. For wet weather, I switch to a wet lube, which provides better adhesion.
Application Techniques
When I apply lubricant, I follow these steps:
- Position the Bike: I place the bike on a stand or flip it upside down to access the chain easily.
- Apply Sparingly: While I gently rotate the pedals backward, I apply a small amount of lube to each link, ensuring I don’t go overboard—too much lubricant can attract dirt.
- Wipe Off Excess: After letting it soak in for a minute, I wipe the chain with a cloth to remove any excess, which keeps it clean and functioning effectively.
Gears and Other Components
Don’t forget the other moving parts! I regularly lubricate my derailleur pivots and any exposed cables to prevent rust and ensure smooth operation. A couple of drops of lubricant on these areas can make a world of difference.
Taking care of lubrication on my bike ensures that everything runs seamlessly, enhancing comfort and preventing unexpected breakdowns. With the chain and gears smooth and ready, it’s time to delve into gear shifting, focusing on how to optimize performance even further.
Gear Shifting: Adjusting for Performance
Achieving seamless gear transitions is critical for enhancing my riding experience and efficiency on my comfort bike. A well-adjusted gear shifting mechanism not only sets me up for a smoother ride but can also make tackling various terrains significantly easier. Here are the essential steps I follow to maintain and adjust my bike’s gear shifting system.
Inspecting the Gear Cables
Regularly inspecting and adjusting my gear cables is the first step to ensure smooth shifts. Here’s what I do:
Fine-Tuning the Derailleur
The derailleur is what guides the chain across the gears, and proper alignment is key. Here’s how I typically go about this:
- Position Adjustment: I ensure that both the high and low limit screws on the derailleur are set correctly. If the chain doesn’t shift to the intended gear, these screws will need tweaking.
- B-Screw Adjustment: This screw helps control the gap between the derailleur pulley and the cassette, ensuring crisp shifts. I adjust it until I achieve a slight gap even under load.
Testing Shifting Performance
After making adjustments, I always conduct a test ride. I shift through all the gears while riding—this helps me catch any missed adjustments and ensures everything is functioning smoothly. If I encounter any skipping or misleading shifts, it’s often a sign that fine-tuning is required once again.
Taking the time to properly maintain and adjust my gear shifting not only enhances my riding experience but also maximizes the efficiency of my bike. With everything shifting beautifully, I’ll next explore storage solutions that will help protect my bike during downtime.
Storage Solutions: Protecting Your Bike
Taking the time to store my comfort bike properly is just as essential as regular maintenance. Whether I’m keeping it in my garage or outdoors, the right storage solutions can protect it from the elements and potential damage, ensuring it’s ready for my next adventure.
Indoor Storage Best Practices
When I opt for indoor storage, I prioritize keeping my bike away from extreme temperatures and humidity. Here are some strategies I find effective:
Outdoor Storage Tips
If outdoor storage is unavoidable, I take extra precautions to shield my bike from the elements:
Implementing these storage solutions allows me to enjoy peace of mind, knowing my bike is safe from damage. With the right care during periods of inactivity, I can keep my comfort bike in optimal condition for every ride.
Now moving forward, we’ll wrap everything up in our conclusion, celebrating the joy of riding while keeping our bikes in prime condition.
Conclusion: Enjoying Your Rides with a Well-Maintained Bike
In conclusion, keeping your comfort bike in optimal condition is essential for enhancing your riding experience. By understanding your bike’s components, committing to regular cleaning, ensuring proper tire care, maintaining brakes, lubricating moving parts, fine-tuning gear shifting, and implementing smart storage solutions, you can prolong your bike’s lifespan and enjoy safer rides.
I encourage you to take these maintenance hacks to heart. A little effort goes a long way in ensuring your comfort bike remains reliable and fun to ride. So gear up, hit the road, and relish every moment on your well-maintained bike!


So many tips! I never thought about tire care until I got a flat last week. That pressure gauge is a good idea!
Glad you found the tips useful, Mark! Tire maintenance can save you from those annoying flats.
It’s a game changer! I had my fair share of flats too before I started checking regularly.
I just bought the 2-in-1 bike lubricant and degreaser. What a lifesaver! My bike hasn’t run this smooth in ages. Highly recommend! 👌
Glad to hear it worked well for you, Brian! Keeping the chain lubricated is crucial.
Does it really work on older bikes too? Mine’s a bit rusty.
I’m confused about brake maintenance. Is it really that important? I mean, I only ride around the neighborhood…
For sure! You don’t want to find out they’re not working when you need them the most!
Yes, Jessica! Brake maintenance is crucial for safety, even on short rides.
I always forget to check my tire pressure before heading out. That digital tire gauge seems like a must-have! Maybe I’ll finally stop getting flat tires… 🤞
I was in the same boat, Karen! That gauge helped me so much, it’s super easy to use.
It really makes a difference! Proper tire pressure can improve your ride significantly.
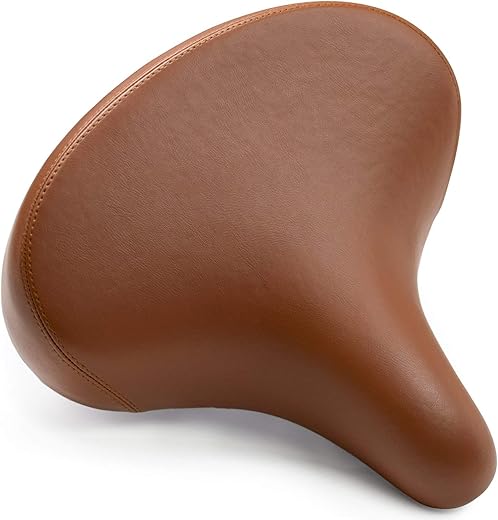
I’ve been using that oversized noseless seat for a while and it’s a game changer! No more sore butt after long rides! 😂 Just wish it came in cooler colors tho. Anyone else feel that way?
I totally agree! It’s super comfy but I’d love some more design options. 😩
Great to hear you’re enjoying the seat, Tommy! Comfort is key for those long rides.
I’m thinking about getting one too, does it fit most bikes?
Wow, I never realized how important regular cleaning was for my bike! I always just wiped it down after a ride, but I guess I need to give it some real TLC. Gonna check out that bike cleaning kit you mentioned! 🧼🚴♀️
Absolutely, Samantha! Regular cleaning can prevent rust and wear, so it’s definitely worth the effort.
Totally! A clean bike not only looks good but also works better! You’ll be amazed at how smooth it rides after a good scrub! 😄
I didn’t know storage was so important for bike maintenance! My bike just sits in the garage. Maybe I should look into better options?
Yes, proper storage can prevent a lot of issues! Consider a bike cover or a dedicated rack.
Definitely! A little extra care in storage goes a long way.
Just read about gear shifting adjustments. Sounds complicated! How often should I really be doing that? 🤔
I usually check mine every couple of months, but more often if I notice any issues.
It depends on how often you ride! Regular check-ups can help keep things smooth.
Just got my bike out for spring, and I’m feeling overwhelmed with all this maintenance stuff. I might just hire someone to do it. Anyone else feel that way?
Totally! YouTube has some great tutorials too if you want to DIY!
I get that! But honestly, it’s not as hard as it seems. Just take it one step at a time!
That’s a common feeling, Nina. Start with the basics and you’ll get the hang of it!